Import and Export CSV File using PHP and MySQL
Import and Export feature is very useful for the data management section. The Import functionality allows the user to upload and insert multiple data in the database. Using the Import feature, the bulk data can be inserted in the database on a single click. The export functionality allows the user to download the table data list and save in a file for offline use. Using the Export feature, multiple records can be downloaded in a file format.
Mostly, the CSV file format is used to import and export data in the web application. CSV (comma-separated values) file stores the data in plain text format and helps to move data between programs. The import and export functionality can be easily implemented with a CSV file using PHP and MySQL. Import CSV file data in database / Export data to CSV file both can be integrated with PHP and MySQL. In this tutorial, we will show you how to import and export CSV file data in database using PHP and MySQL.
In the example import and export script, the following functionality will be implemented.
- Fetch the member’s data from the database and listed in the webpage.
- Import CSV file data into MySQL database using PHP.
- Export data to CSV using PHP and MySQL.
Create Database Table
To store the member’s data, a table needs to be created in the database. The following SQL creates a members table with some basic fields in the MySQL database.
CREATE TABLE `members` (
 `id` int(11) NOT NULL AUTO_INCREMENT,
 `name` varchar(50) COLLATE utf8_unicode_ci NOT NULL,
 `email` varchar(50) COLLATE utf8_unicode_ci NOT NULL,
 `phone` varchar(15) COLLATE utf8_unicode_ci NOT NULL,
 `created` datetime NOT NULL,
 `modified` datetime NOT NULL,
 `status` enum('Active','Inactive') COLLATE utf8_unicode_ci NOT NULL DEFAULT 'Active',
 PRIMARY KEY (`id`)
) ENGINE=InnoDB DEFAULT CHARSET=utf8 COLLATE=utf8_unicode_ci;
CSV File Format
Based on the database table structure, the CSV file should have these fields – Name, Email, Phone, and Status. To import CSV file data in the database, the CSV file format will similar to the following screen.
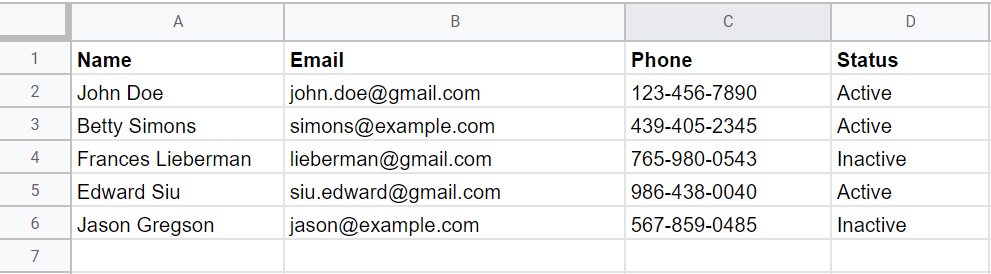
When the data export to CSV file, the downloaded format will look like the following screen.

Database Configuration (dbConfig.php)
The dbConfig.php is used to connect the database. Specify the database host ($dbHost), username ($dbUsername), password ($dbPassword), and name ($dbName) as per your MySQL database credentials.
<?php
// Database configuration
$dbHost     = "localhost";
$dbUsername = "root";
$dbPassword = "root";
$dbName     = "codexworld";

// Create database connection
$db = new mysqli($dbHost, $dbUsername, $dbPassword, $dbName);

// Check connection
if ($db->connect_error) {
    die("Connection failed: " . $db->connect_error);
}
CSV File Upload and Download (index.php)
Initially, the member’s data is listed in the HTML table with import and export option.
- Existing members data are fetched from the database and listed in a tabular format.
- An Import button is placed at the top of the list.
- By clicking the Import button, a CSV file upload form appears.
- On submission, the form is submitted to the
importData.phpfile for importing the CSV file data to the database. - formToggle() – This JavaScript function is used to Show/Hide the CSV upload form and it triggered when the Import button is clicked.
- If the CSV file import request already submitted, the status message is retrieved from the URL and the import status is displayed on the web page.
- An Export button is placed at the top of the list.
- The Export link navigates to the
exportData.phpfile for exporting table data to CSV file.
- The Export link navigates to the
<?php
// Load the database configuration file
include_once 'dbConfig.php';

// Get status message
if(!empty($_GET['status'])){
    switch($_GET['status']){
        case 'succ':
            $statusType = 'alert-success';
            $statusMsg = 'Members data has been imported successfully.';
            break;
        case 'err':
            $statusType = 'alert-danger';
            $statusMsg = 'Some problem occurred, please try again.';
            break;
        case 'invalid_file':
            $statusType = 'alert-danger';
            $statusMsg = 'Please upload a valid CSV file.';
            break;
        default:
            $statusType = '';
            $statusMsg = '';
    }
}
?>

<!-- Display status message -->
<?php if(!empty($statusMsg)){ ?>
<div class="col-xs-12">
    <div class="alert <?php echo $statusType; ?>"><?php echo $statusMsg; ?></div>
</div>
<?php } ?>

<div class="row">
    <!-- Import & Export link -->
    <div class="col-md-12 head">
        <div class="float-right">
            <a href="javascript:void(0);" class="btn btn-success" onclick="formToggle('importFrm');"><i class="plus"></i> Import</a>
            <a href="exportData.php" class="btn btn-primary"><i class="exp"></i> Export</a>
        </div>
    </div>
    <!-- CSV file upload form -->
    <div class="col-md-12" id="importFrm" style="display: none;">
        <form action="importData.php" method="post" enctype="multipart/form-data">
            <input type="file" name="file" />
            <input type="submit" class="btn btn-primary" name="importSubmit" value="IMPORT">
        </form>
    </div>

    <!-- Data list table -->
    <table class="table table-striped table-bordered">
        <thead class="thead-dark">
            <tr>
                <th>#ID</th>
                <th>Name</th>
                <th>Email</th>
                <th>Phone</th>
                <th>Status</th>
            </tr>
        </thead>
        <tbody>
        <?php
        // Get member rows
        $result = $db->query("SELECT * FROM members ORDER BY id DESC");
        if($result->num_rows > 0){
            while($row = $result->fetch_assoc()){
        ?>
            <tr>
                <td><?php echo $row['id']; ?></td>
                <td><?php echo $row['name']; ?></td>
                <td><?php echo $row['email']; ?></td>
                <td><?php echo $row['phone']; ?></td>
                <td><?php echo $row['status']; ?></td>
            </tr>
        <?php } }else{ ?>
            <tr><td colspan="5">No member(s) found...</td></tr>
        <?php } ?>
        </tbody>
    </table>
</div>

<!-- Show/hide CSV upload form -->
<script>
function formToggle(ID){
    var element = document.getElementById(ID);
    if(element.style.display === "none"){
        element.style.display = "block";
    }else{
        element.style.display = "none";
    }
}
</script>
This example code uses Bootstrap 4 library to styling the HTML Table, Form, and Links. You can omit it to include if you don’t want to use Bootstrap structure. Otherwise, include the Bootstrap library file and custom stylesheet file (if any).
<!-- Bootstrap library -->
<link rel="stylesheet" href="assets/bootstrap/bootstrap.min.css">

<!-- Stylesheet file -->
<link rel="stylesheet" href="assets/css/style.css">
Import CSV Data to Database (importData.php)
The importData.php file handles the CSV file upload and data import process with PHP and MySQL.
- Validate the submitted file whether a valid CSV file.
- Check the CSV file upload status using PHP is_uploaded_file() function.
- Open the CSV file using PHP fopen() function.
- Parse data from the CSV file using PHP fgetcsv() function.
- Insert or Update data into the database based on the member’s email.
<?php
// Load the database configuration file
include_once 'dbConfig.php';

if(isset($_POST['importSubmit'])){

    // Allowed mime types
    $csvMimes = array('text/x-comma-separated-values', 'text/comma-separated-values', 'application/octet-stream', 'application/vnd.ms-excel', 'application/x-csv', 'text/x-csv', 'text/csv', 'application/csv', 'application/excel', 'application/vnd.msexcel', 'text/plain');

    // Validate whether selected file is a CSV file
    if(!empty($_FILES['file']['name']) && in_array($_FILES['file']['type'], $csvMimes)){

        // If the file is uploaded
        if(is_uploaded_file($_FILES['file']['tmp_name'])){

            // Open uploaded CSV file with read-only mode
            $csvFile = fopen($_FILES['file']['tmp_name'], 'r');

            // Skip the first line
            fgetcsv($csvFile);

            // Parse data from CSV file line by line
            while(($line = fgetcsv($csvFile)) !== FALSE){
                // Get row data
                $name   = $line[0];
                $email  = $line[1];
                $phone  = $line[2];
                $status = $line[3];

                // Check whether member already exists in the database with the same email
                $prevQuery = "SELECT id FROM members WHERE email = '".$line[1]."'";
                $prevResult = $db->query($prevQuery);

                if($prevResult->num_rows > 0){
                    // Update member data in the database
                    $db->query("UPDATE members SET name = '".$name."', phone = '".$phone."', status = '".$status."', modified = NOW() WHERE email = '".$email."'");
                }else{
                    // Insert member data in the database
                    $db->query("INSERT INTO members (name, email, phone, created, modified, status) VALUES ('".$name."', '".$email."', '".$phone."', NOW(), NOW(), '".$status."')");
                }
            }

            // Close opened CSV file
            fclose($csvFile);

            $qstring = '?status=succ';
        }else{
            $qstring = '?status=err';
        }
    }else{
        $qstring = '?status=invalid_file';
    }
}

// Redirect to the listing page
header("Location: index.php".$qstring);
Export Data to CSV (exportData.php)
The exportData.php file handles the data export process using PHP and MySQL.
- Fetch the records from the database.
- Create and open a file with writing-only mode using PHP fopen() function.
- Set header columns, format as CSV and write it to the opened file using PHP fputcsv() function.
- Output data from the database, format as CSV and write it to file.
- Force browser to download data as CSV format in a file.
<?php
// Load the database configuration file
include_once 'dbConfig.php';

$filename = "members_" . date('Y-m-d') . ".csv";
$delimiter = ",";

// Create a file pointer
$f = fopen('php://memory', 'w');

// Set column headers
$fields = array('ID', 'Name', 'Email', 'Phone', 'Created', 'Status');
fputcsv($f, $fields, $delimiter);

// Get records from the database
$result = $db->query("SELECT * FROM members ORDER BY id DESC");
if($result->num_rows > 0){
    // Output each row of the data, format line as csv and write to file pointer
    while($row = $result->fetch_assoc()){
        $lineData = array($row['id'], $row['name'], $row['email'], $row['phone'], $row['created'], $row['status']);
        fputcsv($f, $lineData, $delimiter);
    }
}

// Move back to beginning of file
fseek($f, 0);

// Set headers to download file rather than displayed
header('Content-Type: text/csv');
header('Content-Disposition: attachment; filename="' . $filename . '";');

// Output all remaining data on a file pointer
fpassthru($f);

// Exit from file
exit();
Export HTML Table Data to CSV using JavaScript
Conclusion
Our example script helps you to easily add the import and export feature to the data list using PHP and MySQL. To make the data management section user-friendly, the export and import functionality is a great option. Also, you can enhance our import CSV file and export data to CSV script with PHP and MySQL as per your needs.
Post a Comment for "Import and Export CSV File using PHP and MySQL"